-
國家級
全民數字素養與技能培訓基地 -
河南省
第一批產教融合型企業建設培育單位 -
鄭州市
數字技能人才(碼農)培養評價聯盟
鄭州java培訓教程:自定義spring
1 Java培訓實戰教程之自定義spring
1.1 描述
在企業級開發中,spring框架應用非常廣。為了讓已經學習過spring框架同學,可以更深入的理解和應用spring,本文將通過自定義spring,更佳系統的闡述spring核心:IoC、AOP。
IoC(Inversion of Control)控制反轉:將對象的創建權交與spring框架,及將創建權反轉給spring框架。IoC主要解決計算機程序的耦合問題。
AOP(Aspect Oriented Programming)面向切面編程:通過運行期動態代理實現程序功能的統一維護的一種技術。
1.2 分析
如果要實現自定義spring,可以將器拆分成多個功能實現。
階段一:編寫配置文件,服務器tomcat啟動時,加載配置文件
階段二:使用Jsoup解析xml,并封裝到指定的JavaBean中
階段三:編寫工廠類用于創建指定bean,并完成property注入
階段四:使用@Transactional進行事務管理
1.3 搭建環境

1.3.1 javabean
public?class?User {
private?Integer uid;
private?String username;
private?String password;
1.3.2?? ?dao
public?interface?UserDao {
/**
* 保存
*?@param?user
*/
public?void?save(User user);}
public?class?UserDaoImpl?implements?UserDao {
@Override
public?void?save(User user) {
//TODO?暫時只打印
System.out.println(user);
}
}
1.3.3?? service
public?interface?UserService {
/**
* 注冊
*?@param?user
*/
public?void?register(User user);
}
public?class?UserServiceImpl?implements?UserService {
private?UserDao userDao;
public?void?setUserDao(UserDao userDao) {
this.userDao = userDao;
}
@Override
public?void?register(User user) {
this.userDao.save(user);
}
}
1.4?? 階段一:編寫配置文件,服務器啟動加載
1.4.1?? xml配置文件
l? 在src下添加“applicationContext.xml”,并將dao和service配置到xml文件中。
l? 使用<bean>標簽配置一個實現類
class:??? 配置實現類的全限定名稱
id: 進行唯一命名,用于提供給程序獲得
l? 使用<property>配置javabean屬性的注入
name:?? 配置的service的屬性名
ref:?????? 配置其他bean對象的引用

<?xml version=”1.0″?encoding=”UTF-8″?>
<beans>
<!–?dao?–>
<bean id=”userDaoId”?class=”cn.itcast.demo.dao.impl.UserDaoImpl”></bean>
<!– service –>
<bean id=”userServiceId”?class=”cn.itcast.demo.service.impl.UserServiceImpl”>
<property name=”userDao”?ref=”userDaoId”></property>
</bean>
</beans>
1.4.2?? 加載配置文件
l? tomcat啟動時,加載配置文件方式總結:
1.編寫Servlet,配置servlet,并添加<load-on-startup>,在init(ServletConfig)初始化方式中加載。
2.編寫Filter,配置filter,在init(FilterConfig)初始化方法中加載
3.編寫Listener,實現接口ServletContext,配置listener,在contextInitialized(ServletContextEvent sce)方法中加載。
l? spring采用listener方案
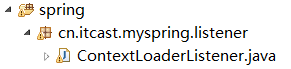
1.提供實現類ContextLoaderListener
2.編寫全局初始化參數contextConfigLocation,用于確定xml位置
<param-value>classpath:applicationContext.xml</param-value> 加載類路徑下的xml文件
<param-value>applicationContext.xml</param-value> 加載WEB-INF目錄的配置文件
l? xml配置
<!– 確定xml位置 –>
<context-param>
<param-name>contextConfigLocation</param-name>
<param-value>classpath:applicationContext.xml</param-value>
</context-param><!– 配置監聽器 –>
<listener>
<listener-class>cn.itcast.myspring.listener.ContextLoaderListener</listener-class>
</listener>
l? 實現類
1.4.2?? 加載配置文件
l? tomcat啟動時,加載配置文件方式總結:
1.編寫Servlet,配置servlet,并添加<load-on-startup>,在init(ServletConfig)初始化方式中加載。
2.編寫Filter,配置filter,在init(FilterConfig)初始化方法中加載
3.編寫Listener,實現接口ServletContext,配置listener,在contextInitialized(ServletContextEvent sce)方法中加載。
l? spring采用listener方案
1.提供實現類ContextLoaderListener
2.編寫全局初始化參數contextConfigLocation,用于確定xml位置
<param-value>classpath:applicationContext.xml</param-value> 加載類路徑下的xml文件
<param-value>applicationContext.xml</param-value> 加載WEB-INF目錄的配置文件
l? xml配置
<!– 確定xml位置 –>
<context-param>
<param-name>contextConfigLocation</param-name>
<param-value>classpath:applicationContext.xml</param-value>
</context-param><!– 配置監聽器 –>
<listener>
<listener-class>cn.itcast.myspring.listener.ContextLoaderListener</listener-class>
</listener>
l? 實現類
public?class?ContextLoaderListener?implements?ServletContextListener {
@Override
public?void?contextInitialized(ServletContextEvent sce) {
// 0 獲得ServletContext對象應用
ServletContext context = sce.getServletContext();
// 1 加載配置
String config = context.getInitParameter(“contextConfigLocation”);
if(config ==?null){ //默認配置文件位置
config= “applicationContext.xml”;
}
InputStream xmlIs =?null;
// 2? 處理路徑不同情況
// * classpath:applicationContext.xml –> 表示?src/applicationContext.xml
// * applicationContext.xml –> 表示 /WEB-INF/applicationContext.xml
if?(config.startsWith(“classpath:”)) { // 2.1 加載 類路徑 (classpath、src)下的xml
xmlIs = ContextLoaderListener.class.getClassLoader().getResourceAsStream(config.substring(“classpath:”.length()));
}?else?{ //2.2 加載/WEB-INF/目錄下的資源
xmlIs = context.getResourceAsStream(“/WEB-INF/” + config);
}
//2.3 配置文件必須存在,否則拋異常
if(xmlIs ==?null){
throw?new?RuntimeException(“資源文件[“+config+”]沒有找到”);
}
//TODO?3 解析配置
if?(xmlIs !=?null) {
System.out.println(xmlIs);
}
}
@Override
public?void?contextDestroyed(ServletContextEvent sce) {
}
}
1.5?? 階段二:解析xml,并封裝到指定javabean中
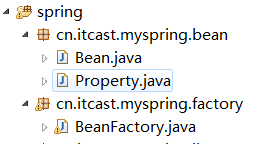
1.提供Property類,用于封裝<property name=” ”?ref=” “></property>
2.提供Bean類,用于封裝<bean id=” ”?class=” “>
一個<bean> 標簽體中可以配置多個<property>需要一個容器存放,沒有順序要求,且不能重復,選擇Set
3.提供BeanFactory類,并在類同提供容器存放多個Bean 類,為了方便獲取使用Map。
1.5?? 階段二:解析xml,并封裝到指定javabean中
1.提供Property類,用于封裝<property name=” ”?ref=” “></property>
2.提供Bean類,用于封裝<bean id=” ”?class=” “>
一個<bean> 標簽體中可以配置多個<property>需要一個容器存放,沒有順序要求,且不能重復,選擇Set
3.提供BeanFactory類,并在類同提供容器存放多個Bean 類,為了方便獲取使用Map。
1.5.1?? ?property javabean
/**
* 用于封裝 <property name=”userDao”?ref=”userDaoId”></property>
*/
public?class?Property {//屬性名稱
private?String name;
//另一個bean引用名
private?String ref;
public?Property(String name, String ref) {
super();
this.name = name;
this.ref = ref;
}
1.5.2?? ?bean? javabean
public?class?Bean {
//bean名稱
private?String beanId;
//bean的實現類
private?String beanClass;
//取值:singleton 單例,prototype 原型(多例)【擴展】
private?String beanType;
//所有的property
private?Set<Property> propSet =?new?HashSet<Property>();
public?Bean(String beanId, String beanClass) {
super();
this.beanId =?beanId;
this.beanClass = beanClass;
}
1.5.3?? ?BeanFactory 工廠模式類
public?class?BeanFactory {
//////////////////工廠模式////////////////////////
private?static?BeanFactory?factory?=?new?BeanFactory();
private?BeanFactory(){
}
/**
* 獲得工廠實例
*?@author?lt
*?@return
*/
public?static?BeanFactory getInstance() {
return?factory;
}
1.5.4?? ?BeanFactory 提供Map 緩存
//////////////////緩存所有的Bean/////////////////////////////////
//bean數據緩存集合 ,key:bean名稱 ,value:bean封裝對象
private?static?Map<String, Bean>?beanData;// = new HashMap<String, String>();
static{
// 從配置文件中獲得相應的數據 1.properties 2.xml
//beanData.put(“userDao”, “com.itheima.ebs.service.impl.BusinessServiceImpl”);
}public?static?void?setBeanData(Map<String, Bean> beanData) {
BeanFactory.beanData?= beanData;
}
1.5.5?? ?修改Listener解析xml
l? 使用Jsoup解析,導入jar包
l? 修改contextInitialized 方法
//TODO?3 解析配置
if?(xmlIs !=?null) {
//3.1解析
Map<String, Bean> data =?parserBeanXml(xmlIs);
//3.2 將解析結果放置到工廠中
BeanFactory.setBeanData(data);
}
l? 解析方法parserBeanXml(InputStream)
/**
* 將數據解析成bean
*?@param?xmlIs
*?@return
*/
public?static?Map<String, Bean> parserBeanXml(InputStream xmlIs) {
try?{
//0提供緩沖區域
Map<String, Bean> data =?new?HashMap<String, Bean>();//1解析文件,并獲得Document
Document document = Jsoup.parse(xmlIs, “UTF-8”, “”);
//2 獲得所有的bean元素
Elements allBeanElement = document.getElementsByTag(“bean”);
//3遍歷
for?(Element beanElement : allBeanElement) {
//5 將解析的結果封裝到bean中
// 5.1 bean名稱
String beanId = beanElement.attr(“id”);
// 5.2 bean實現類
String beanClass = beanElement.attr(“class”);
// 5.3 封裝到Bean對象
Bean bean =?new?Bean(beanId,beanClass);
// 6 獲得所有的子元素 property
Elements allPropertyElement = beanElement.children();
for?(Element propertyElement : allPropertyElement) {
String propName = propertyElement.attr(“name”);
String propRef = propertyElement.attr(“ref”);
Property property =?new?Property(propName, propRef);
// 6.1 將屬性追加到bean中
bean.getPropSet().add(property);
}
data.put(beanId, bean);
}
return?data;
}?catch?(Exception e) {
throw?new?RuntimeException(e);
}
}
1.6?? 階段三:完善BeanFactory獲得實例
l? 使用 BeanUtils.setProperty 設置數據,需要導入jar包
l? BeanFactory 提供 getBean方法
////////////////獲得Bean實例///////////////////////////////////
public?Object getBean(String beanId) {try?{
// 通過bean 的名稱獲得具體實現類
Bean bean =?beanData.get(beanId);
if(bean ==null)?return?null;
String beanClass = bean.getBeanClass();
Class?clazz = Class.forName(beanClass);
Object beanObj = clazz.newInstance();
//DI 依賴注入,將在配置文件中設置的內容,通過bean的set方法設置到bean實例中
Set<Property> props = bean.getPropSet();
for?(Property property : props) {
String propName = property.getName();
String propRef = property.getRef(); //另一個javabean,需要重容器中獲得
Object propRefObj = getBean(propRef);
//PropertyDescriptor?pd?= new PropertyDescriptor(propName,?clazz);
//pd.getWriteMethod().invoke(bean, propRefObj);
BeanUtils.setProperty(beanObj, propName, propRefObj);
}
return?beanObj;
}?catch?(Exception e) {
throw?new?RuntimeException(e);
}
}
l? 測試
//測試
UserService userService = (UserService) BeanFactory.getInstance().getBean(“userServiceId”);
userService.register(null);
1.7?? 階段四:spring事務管理
1.7.1?? 修改自定義spring
l? 提供JdbcUtils工具類,用于在當前線程中共享Connection
l? 提供@Transaction 用于標記那些類需要進行事務管理
1.7.1.1???????? JdbcUtils工具類
l? 使用ThreadLocal 保存Connection,在當前線程中共享Connection
l? 并提供提交和回滾方法,自動關閉連接
public?class?JdbcUtils {
private?static?ThreadLocal<Connection>?local?=?new?ThreadLocal<Connection>();
static{
try?{
//注冊驅動
Class.forName(“com.mysql.jdbc.Driver”);
}?catch?(Exception e) {
throw?new?RuntimeException(e);
}
}
/**
* 獲得連接
*?@return
*/
public?static?Connection getConnection(){
try?{
Connection conn =?local.get();
if?(conn ==?null) {
conn = DriverManager.getConnection(“jdbc:mysql://localhost:3306/test2”, “root”, “1234”);
local.set(conn);
}
return?conn;
}?catch?(Exception e) {
throw?new?RuntimeException(e);
}
}
/**
* 提交事務
*/
public?static?void?commit() {
Connection conn =?getConnection();
DbUtils.commitAndCloseQuietly(conn);
}
/**
* 回滾事務
*/
public?static?void?rollback() {
Connection conn =?getConnection();
DbUtils.rollbackAndCloseQuietly(conn);
}
}
1.7.1.2???????? @Transactional
@Target(ElementType.TYPE)
@Retention(RetentionPolicy.RUNTIME)
public?@interface?Transactional {}
1.7.1.3???????? 修改BeanFactory
l? 通過getBean 獲得對象實例時,如果對象有@Transactional注解,將返回代理對象,對目標對象上所有的方法都進行事務管理。
l? 如果沒有異常提交事務,并關閉連接
l? 如果有異常回滾事務,并關閉連接
public?Object getBean(String beanId) {
try?{
// 通過bean 的名稱獲得具體實現類
Bean bean =?beanData.get(beanId);
if(bean ==null)?return?null;
String beanClass = bean.getBeanClass();
Class<?> clazz = Class.forName(beanClass);
Object beanObj = clazz.newInstance();
//DI 依賴注入,將在配置文件中設置的內容,通過bean的set方法設置到bean實例中
Set<Property> props = bean.getPropSet();
for?(Property property : props) {
String propName = property.getName();
String propRef = property.getRef(); //另一個javabean,需要重容器中獲得
Object propRefObj = getBean(propRef);
//PropertyDescriptor?pd?= new PropertyDescriptor(propName,?clazz);
//pd.getWriteMethod().invoke(bean, propRefObj);
BeanUtils.setProperty(beanObj, propName, propRefObj);
}
//如果類上有注解返回代理對象
if(clazz.isAnnotationPresent(Transactional.class)){
final?Object _beanObj = beanObj;
return?Proxy.newProxyInstance(
clazz.getClassLoader(),
clazz.getInterfaces(),
new?InvocationHandler() {
@Override
public?Object invoke(Object proxy, Method method, Object[] args)?throws?Throwable {
try?{
//開啟事務
JdbcUtils.getConnection().setAutoCommit(false);
//執行目標方法
Object obj = method.invoke(_beanObj, args);
//提交事務
JdbcUtils.commit();
return?obj;
}?catch?(Exception e) {
//回顧事務
JdbcUtils.rollback();
throw?new?RuntimeException(e);
}
}
});
}
return?beanObj;
}?catch?(Exception e) {
throw?new?RuntimeException(e);
}
}
1.7.2?? 初始化數據庫
create table account(
id int primary key auto_increment,
username varchar(50),
money int
);
insert into account(username,money) values(‘jack’,’10000′);
insert into account(username,money) values(‘rose’,’10000′);
1.7.3?? dao層
l? 必須使用自定義spring提供的JdbcUtils獲得連接,從而保證當前線程使用的是同一個線程。
l? 通過xml配置文件創建QueryRunner實例,并注入給dao
l? 擴展:如果將QueryRunner和JdbcUtils都省略,需要自己實現JdbcTemplate完成。
public?class?AccountDaoImpl?implements?AccountDao {
private?QueryRunner runner;
public?void?setRunner(QueryRunner runner) {
this.runner = runner;
}
@Override
public?void?out(String outer, Integer money) {
try?{
Connection conn = JdbcUtils.getConnection();
runner.update(conn, “update account set money = money – ? where username = ?”, money, outer);
}?catch?(Exception e) {
throw?new?RuntimeException(e);
}
}
@Override
public?void?in(String inner, Integer money) {
try?{
Connection conn = JdbcUtils.getConnection();
runner.update(conn, “update account set money = money + ? where username = ?”, money,inner);
}?catch?(Exception e) {
throw?new?RuntimeException(e);
}
}
}
1.7.4?? service層
l? 在實現類上添加注解
@Transactional
public?class?AccountServiceImpl?implements?AccountService {private?AccountDao accountDao;
public?void?setAccountDao(AccountDao accountDao) {
this.accountDao = accountDao;
}
@Override
public?void?transfer(String?outer, String inner, Integer money) {
accountDao.out(outer, money);
//斷電
//??????int?i = 1/0;
accountDao.in(inner, money);
}
}
1.7.5?? 編寫spring配置
<!– 創建queryRunner –>
<bean id=”runner”?class=”org.apache.commons.dbutils.QueryRunner”></bean><bean id=”accountDao”?class=”cn.itcast.dao.impl.AccountDaoImpl”>
<property name=”runner”?ref=”runner”></property>
</bean>
<!– service –>
<bean id=”accountService”?class=”cn.itcast.service.impl.AccountServiceImpl”>
<property name=”accountDao”?ref=”accountDao”></property>
</bean>
1.7.6?? 編寫servlet測試
l? 通過請求servlet,進行轉賬,此處使用固定值進行測試
public?class?AccountServlet?extends?HttpServlet {
public?void?doGet(HttpServletRequest request, HttpServletResponse response)?throws?ServletException, IOException {
AccountService accountService = (AccountService) BeanFactory.getInstance().getBean(“accountService”);
accountService.transfer(“jack”, “rose”, 100);
}